Getting started
Requirements
NP Budgeting is powered by an Add-on, or extension, for Google Sheets. This extends the functionality of Google Sheets. In order to use NP Budgeting, you need to have:
- A Gmail account. This can be a personal @gmail.com email address or a workplace Gmail account. If you’re using a workspace account, your settings might require an admin to install Add-ons for you. Instructions on how to do this are provided below.
- Internet access.
Install the NP Budgeting Add-on
Before you can use NP Budgeting, you’ll need to install the Add-on. There are two ways to do this:
Workspace admins: If you are using Google Workspace for your organization, an admin can install the add-on for all users in the organization. Click here for instructions on how to install an organization-wide add-on. The app name to search for is “NP Budgeting.”
Individual users: To install the add-on only for your Google account (regardless of whether it is a personal or workspace account), click Extensions in the menu bar, then Add-ons > Get add-ons and search for “NP Budgeting.”
Once the Add-on is installed, you can use NP Budgeting in any number of Google Sheets.
Launch NP Budgeting
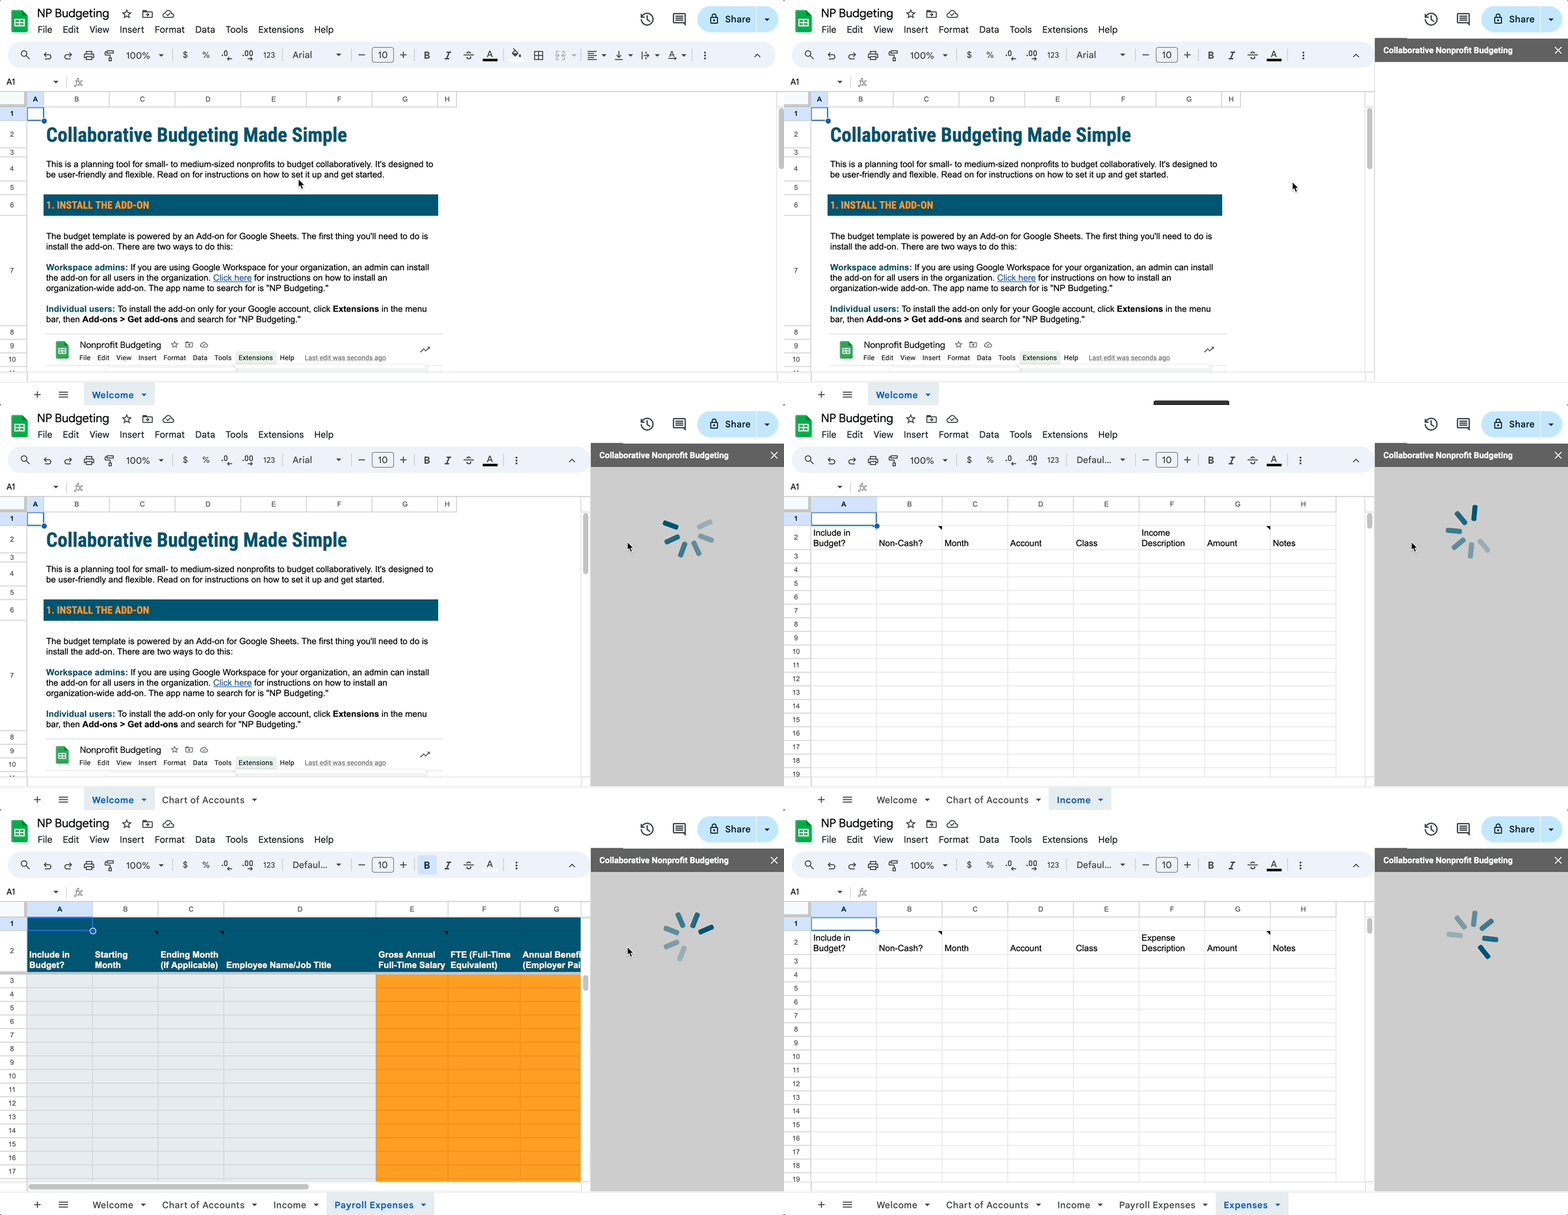
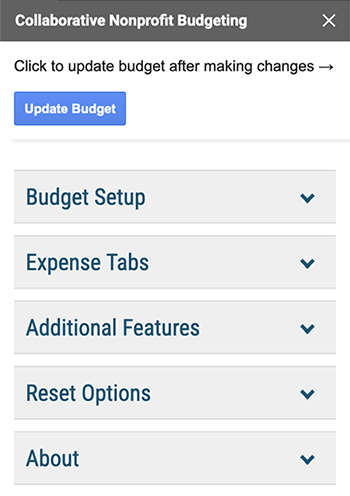
Once it’s installed, open the Extensions menu and click NP Budgeting > Open Budget Menu to launch the NP Budgeting sidebar. This sidebar is how you will set up, configure, and update your budget.
The first time you open the add-on, you’ll see a “Let’s go” button on the sidebar. This will generate the worksheets you’ll need to build your budget—Chart of Accounts, Income, Payroll Expenses, and Expenses.

Note: It can take up to 1-2 minutes for all of the tabs to generate.
Note: If the NP Budgeting sidebar won’t load (you just get a spinning wheel of doom), make sure the Google account you’re using the Add-on with is the “default account.” If it’s not, use incognito mode or sign out of all accounts and sign into the one you want to use NP Budgeting with.

Set up the template
1. Chart of Accounts Tab
While the template comes pre-loaded with a chart of accounts, you have complete control over the income and expense accounts that are used in your budget. Start setting up the spreadsheet by updating the income and expense accounts to match your organization’s chart of accounts. You can also group accounts by category, which allows you to roll up the budget into condensed categories for simpler reporting.
In this tab you can also enter your classes for functional expense reporting. The template can handle as many classes as you need. Every transaction can be associated to a class, and employee time can be split by percentage among classes.
2. Sidebar configuration

Key settings for your budget are stored in the sidebar.
Budget Setup
When you click the “Edit” button you will be prompted to enter the following basic information:
- Organization name
- Starting month of your fiscal year
- The year this budget is for
- Your beginning cash balance (that is, the amount of cash your organization had on hand as of the last day of the previous fiscal year)
- Which percentage you would like to use to budget the cost of employer payroll tax expenses. The default setting for this is 9%. Employer payroll taxes are calculated automatically based on the percentage you enter. Employer payroll taxes include: medicare and social security (7.65% of gross wages), federal unemployment for organizations other than 501(c)(3)s (6% of the first $7,000 paid to each employee), state unemployment, and other state programs.
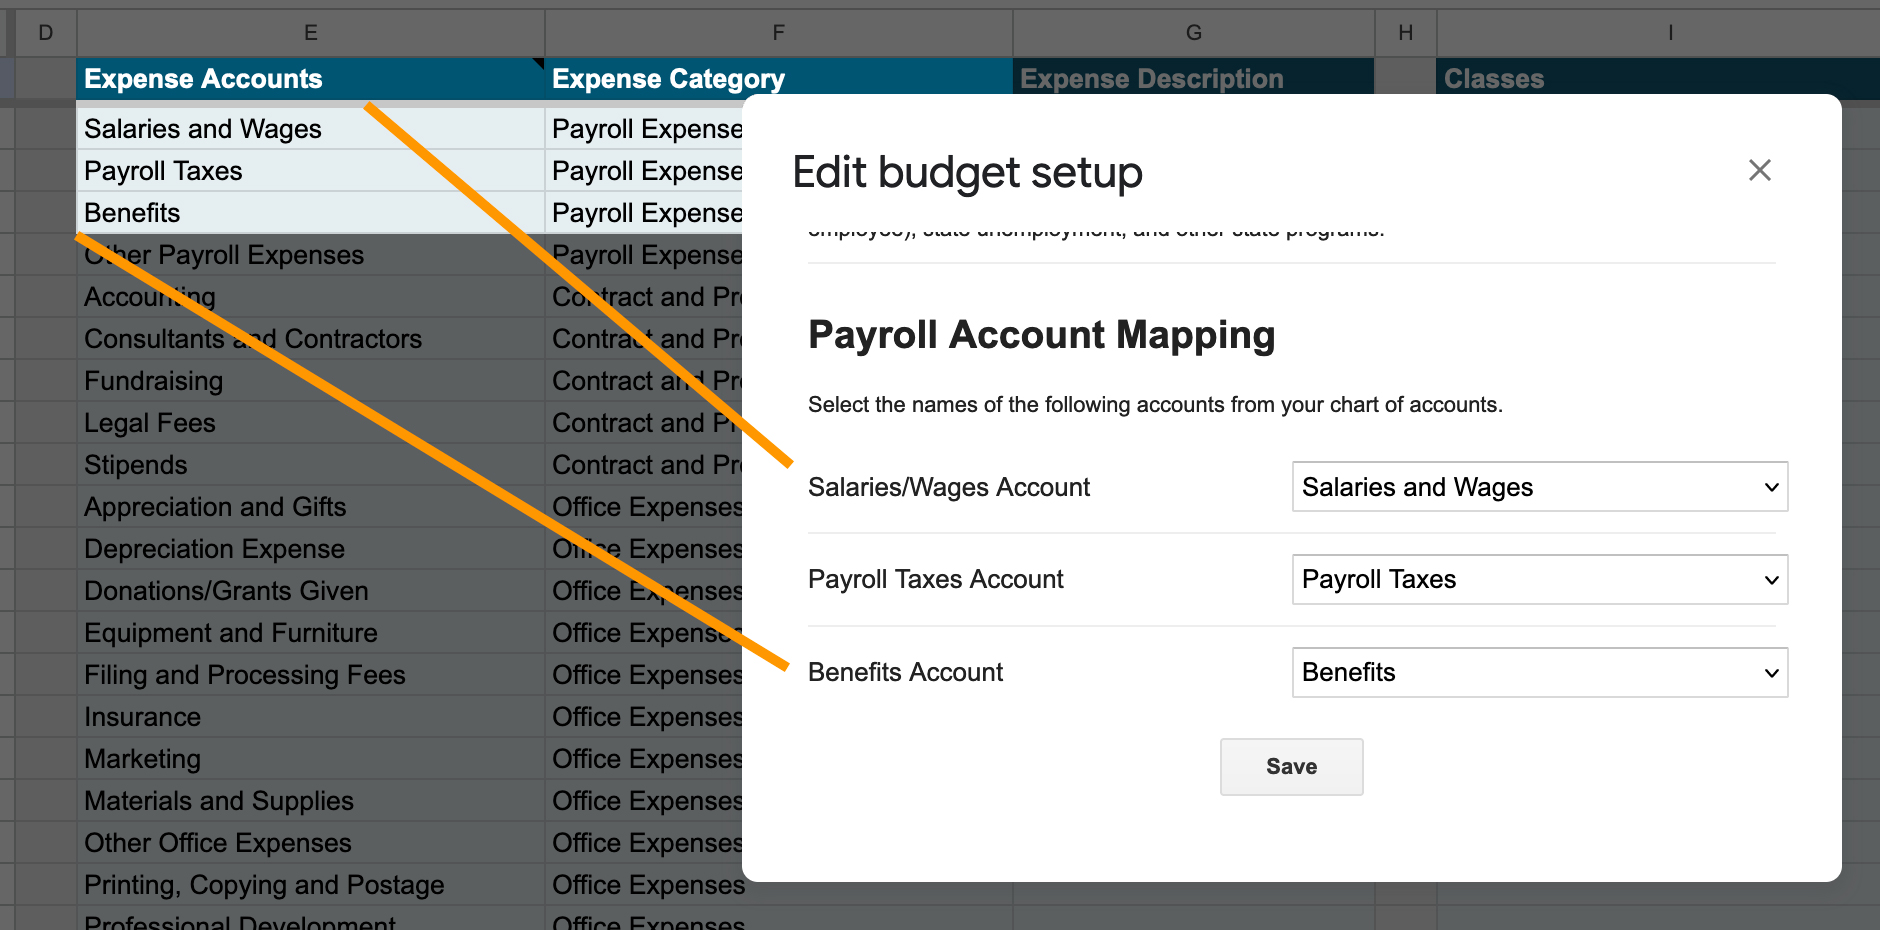
In order to properly use the template, you must set up payroll account mapping. The template requires one account code for employer payroll taxes, and one for employer-paid benefits. If you updated the payroll expenses in the chart of accounts, make sure to update the mapping in this section.

Note: If you leave the mapping blank, the template will not work. Keep this section mapped even if you don’t have any payroll expenses.
Expense Tabs
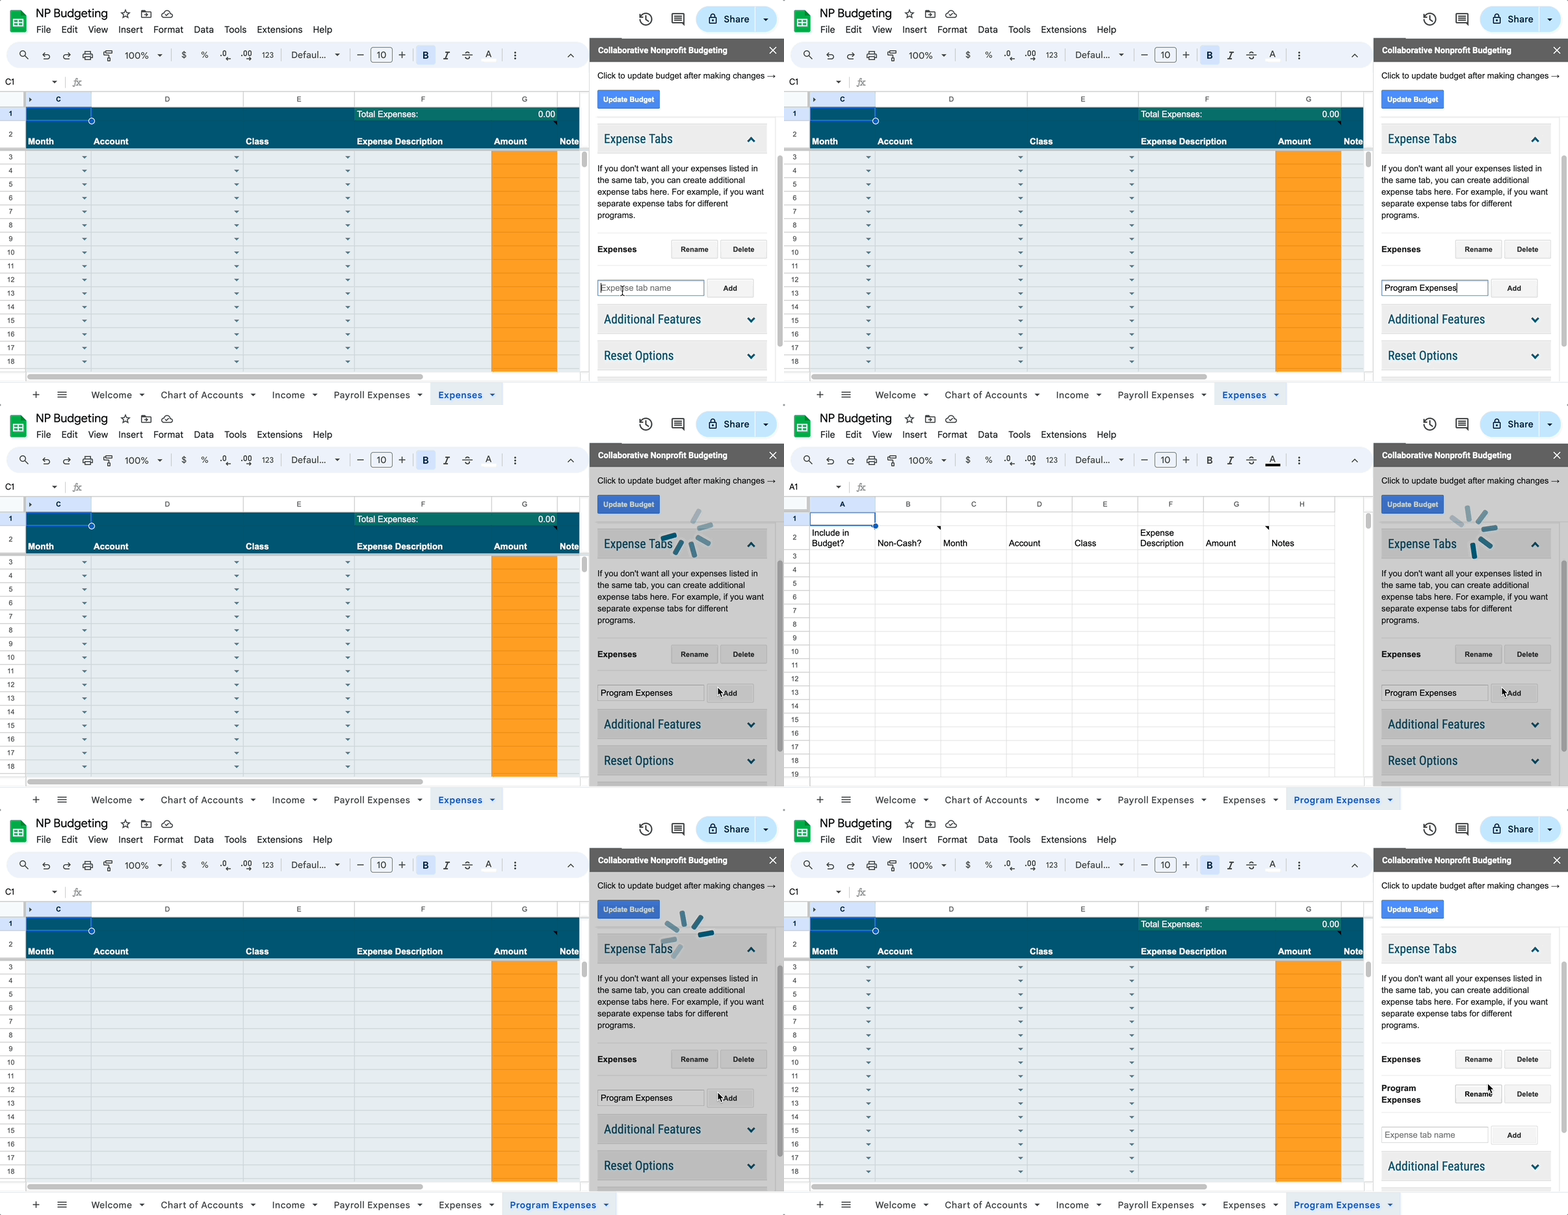
The default set up for the template is one Expenses tab for you to enter all non-payroll expenses into. You can create, rename, and delete additional expenses tabs here.

Note: The data in any Expense tabs that you delete here will be erased.
Additional Features
When the budget is finished and approved, you may check the box here to disable the “Update Budget” button. Note that anyone can renable the edit button, but this discourages other collaborators from editing.